relish
Component-based UI testing
![]()
Tutorial 5: Adding more fields
| < Adding tasks | ^ Tutorial | Deleting tasks > |
Now let’s see what happens if there’s a sudden change or requirements. Let’s say that the customer suddenly decides that instead of just recording the name against each task, we also want to record a priority value of H (High), M (Medium) or L (Low).
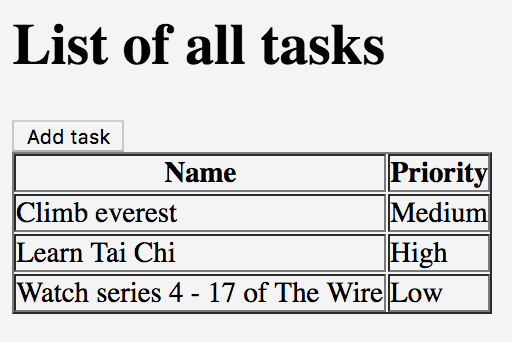
Let’s look at what kind of impact that has on our tests. First, let’s edit the feature file to include the new Priority field:
Scenario: I can add a task
  Given I am on the task list
  When I choose to add these tasks
    | Name           | Priority |
    | Buy some bread | H        |
    | Buy some milk  | L        |
  Then I will see this on the list of tasks
    | Name           | Priority |
    | Buy some bread | High     |
    | Buy some milk  | Low      |
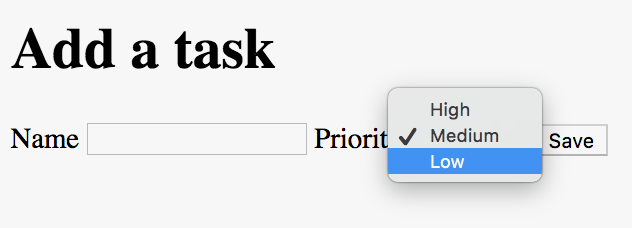
Note: when we add tasks we are specifying the value (H, M or L) but when we check what we want on the screen, we using the descriptions (High, Medium or Low). That’s because we’re going to send the values to the dropdown list on the screen, but the descriptions will appear in the table of tasks. Relish will usually cope with descriptions on <select/> fields, but it’s better to specify values in your tests if they are going to be used to update <select/> fields or radio buttons.
What do we need to do to handle the new Priority value? We will begin by adding a new field to the AddTaskPage class:
package com.example.components;

import org.openqa.selenium.By;

import uk.co.blackpepper.relish.selenide.DropDown;
import uk.co.blackpepper.relish.selenide.InputText;
import uk.co.blackpepper.relish.selenide.Page;
import uk.co.blackpepper.relish.selenide.SelenideWidget;

public class AddTaskPage extends Page {
    public AddTaskPage() {
        super("/add.html");
    }

    public InputText name() {
        return new InputText(By.id("name"), this);
    }

    public DropDown priority() {
        return new DropDown(By.id("priority"), this);
    }

    public SelenideWidget saveButton() {
        return new SelenideWidget(By.className("saveButton"), this);
    }
}
The field we’ve added is a Relish DropDown widget, which is used to interact with HTML <select/> elements.
What else do we need to do? Well actually, nothing. Let’s review the updated scenario:
Scenario: I can add a task
  Given I am on the task list
  When I choose to add these tasks
    | Name           | Priority |
    | Buy some bread | H        |
    | Buy some milk  | L        |
  Then I will see this on the list of tasks
    | Name           | Priority |
    | Buy some bread | High     |
    | Buy some milk  | Low      |
We already have a step to add tasks:
@When("^I choose to add these tasks$")
public void iChooseToAddTheseTasks(List<TableRow> tasks)
{
    for(TableRow task : tasks)
    {
        taskPage.addButton().click();
        addTaskPage.set(task);
        addTaskPage.saveButton().click();
    }
}
This code passes the contents of the feature table straight to the AddTaskPage. Relish will match the new Priority column with the DropDown widget returned from the AddTaskPage.priority() method, and pass it the H, M and L values to it.
We’ve also already implemented the step to check the list of all tasks:
@Then("^I will see this on the list of tasks$")
public void iWillSeeThisOnTheListOfTasks(List<TableRow> tasks)
{
    taskPage.taskTable().matches(tasks);
}
This passes the feature table to the Table object, which will automatically checks that the new column appears in the table.
This demonstrates how Relish can help you not only create UI tests more quickly, but it can also greatly reduce the impact of changes to your tests.
| < Adding tasks | ^ Tutorial | Deleting tasks > |